Showing posts with label entry. Show all posts

Tuesday, July 9, 2013

the Entry

After returning from Arizona we quickly realized that with a little bean ball - our free time is consumed with wanting to spend every minute with her - especially since we both work full time! SO... we decided to finish the entry and enlisted help. The walls needed to be painted and the trim work needed to be touched up (it was gross & grimy and needed sanding smooth and restaining/ sealing). We did it a bit backwards as we thought we would refinish the trimwork at a later date - so we painted first, did the trim, and then had to touch up the paint... oops!

Our exterior house painter came and did the paint job for us and we found a restoration person to give the trimwork the TLC it needed (this again, was another wild goose chase)... All in all, I couldn't be happier or more thankful to have this work done, done well, and complete.

the Before - The trim is dark, so you can't see how bad it looks in person...
and the walls needed a lot of plaster repair (also not visible)

the Before - A better view of the trim.
You could scratch the black grime off with your fingernail (GROSS!!!)

the After - nice and crisp. All trim and walls are crisp and smooth. 
Details: The trim guys went above and beyond our expectations of sanding to bare wood all the trim work in this area, including the stair landing window. My biggest concern was dust from the sanding but their equipment kept it contained and each night we came home, we couldn't tell that they had been there (other than the progress, of course). We used Michael Light of ML Restoration. Great guy, lives in the neighborhood. We also stained the risers on the stairs, as it was evident that they had previously been stained. We used Miller Paint... and I'd have to look up the color.

shut the Front Door

Hello Friends! Right around Easter we had the front door and side lites removed to be restored. It was a wild goose chase to find someone to restore the door (vs. replace) - and so glad we did. Eric, of Willow Classic Woodworking, and his team did a great job and we couldn't be more pleased.

It's amazing to have a front door that shuts tight, is smooth and sealed, and has hardware in working order. No more loose glass, old cat claw marks from the previous owners or years of black grime! I don't have to worry about whoever comes to the door and knocks on the glass, for fear that before it would come loose and shatter on the floor!

Please pardon the iphone photos - that's the only way you'll see pictures these days!

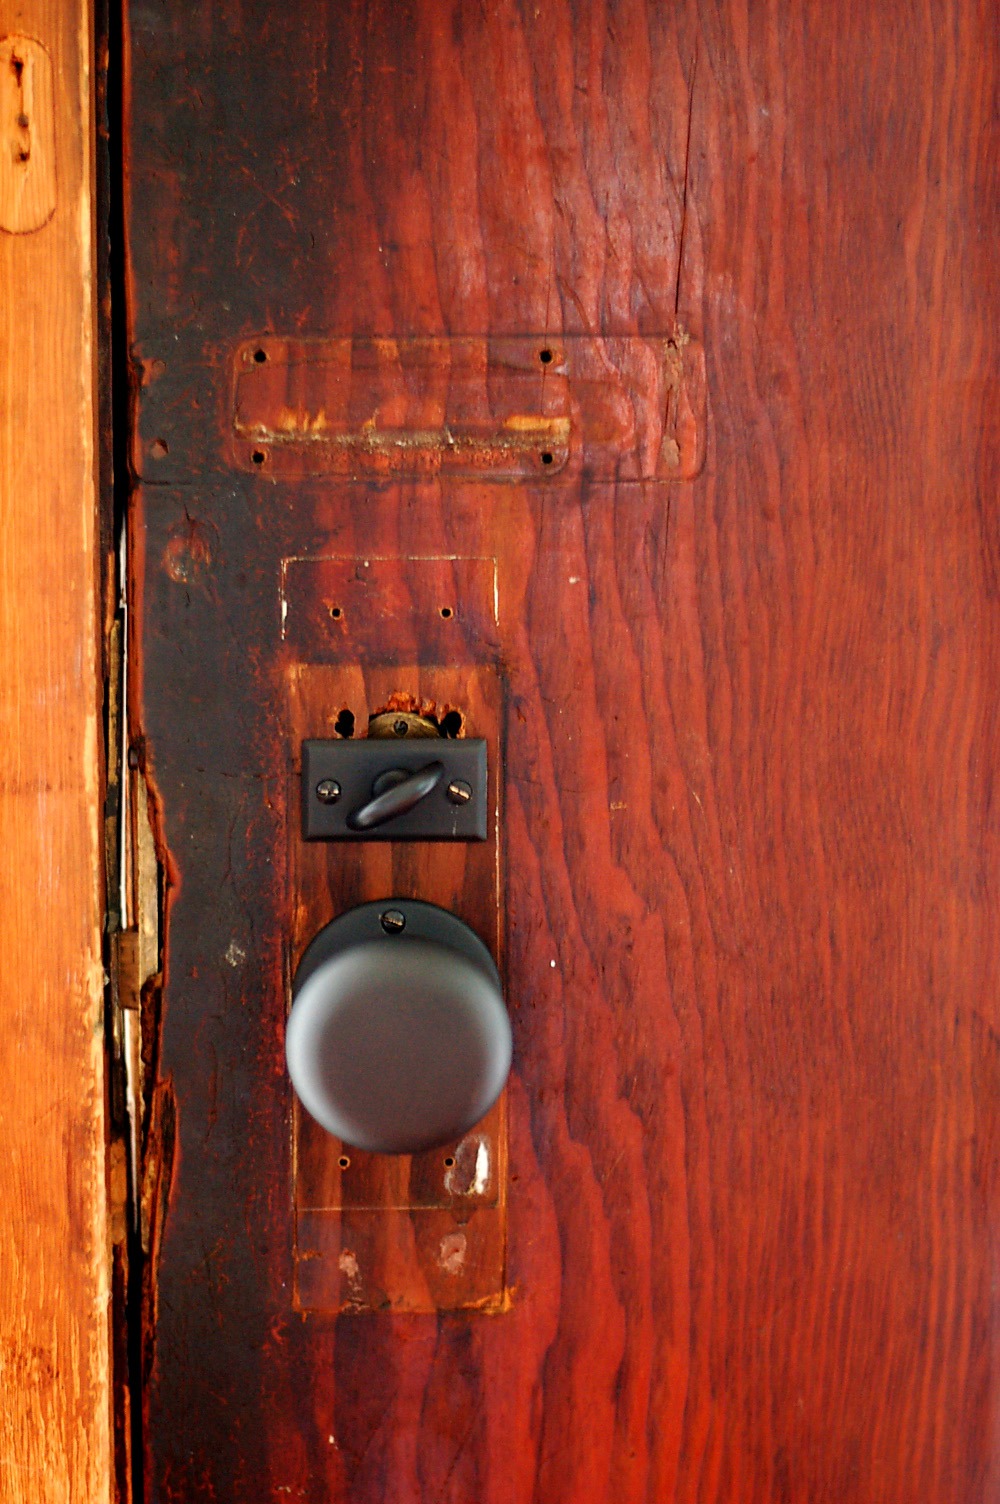
front door before, with new hardware
(notice all the holes from over the years)

front door, before - mismatched trim

front door after - all touched up
all the holes are gone!

front door after - you can barely see the round patch from the old dead bolt

front door after - working lockset, sanded smooth, weather tight
Details - I took the front door handle to a machine shop to have it repaired as parts had broken off over the years and thus, it stopped working. The front door and side lites were sealed with many coats of a marine grade (boat) finish, so it's protected for years from the sun/ UV. All the glass was caulked into place with a clear silicone to prevent air leakage and weather stripping was installed around the door frame for a better seal.

Monday, March 25, 2013

The Entry

If you follow me on FB or Instagram, you will know that we are painting the entry. It's the smallest room in the house, so it beats me why we never chose to paint it... Either way, we are now after almost five years in the house! We had a tough time picking a color that would work well with both the downstairs stained woodwork, and carry itself up the stairs to the painted trim work above.


You can't tell, but now the trimwork now looks like crap. This is the only room in the house where we haven't worked on the wood trim. You didn't really notice it because the walls were in such bad shape. But now with the walls touched up and painted... add that to the list!

Tuesday, March 19, 2013

the Front Door

We saved all the small projects for the end... Like fixing the front door hardware, painting the entry, and the list truly doesn't end. While home on maternity leave I was ambitious to get lots of these small things accomplished. Little did I realize that it would be in half hour blocks of time, and how much fun it is to just hang out with my little lady!

Cut to the chase, the front door hardware never really worked, and had been hacked many years prior to us. The only thing securing us from the outside was a dead bolt, not original to the house.

While my parents were here and keeping the Bean occupied, we took the door hardware apart and started the quest to get it working again. First stop, Rejuvenation. They were wonderful and explained to me what was broken, and how they didn't have the resources to fix it. Dang it!

Problem 1: the thumb latch on the exterior was broken and needed a new tab braised (welded) on to engage the mortise again. Luckily, there is a machine shop (Gilbertson Machine) a few blocks away and I was able to get it repaired for less than $100! They were great and had it back to me the next day!

Problem 2: the door hardware on the inside of the door was crap. And coincidentally, all hardware was on sale at Rejuvenation the weekend we were there. Score! A new doorknob and plate were purchased to match the rest of the house, as we slowly update all our faceplates, hinges, etc.

New Knob and Dead Bolt, latch

Problem 3: we can't lock the door other than the dead bolt. After searching the salvage bins at Rejuvenation and coming up empty, I stopped by Old Portland (who recently moved nearby) and they had an identical mortise to ours, but with a thumb latch to secure the door. Hooray!

Problem 4: the thumb latch only secures the door from the inside. What about a new key to lock the door from the outside? Enter, Atlasta lock on NE Grand. I took the mortise to them and in less than five minutes and $15 later, I was on my way home with a new cylinder and lock to operate the door!

Thumb Latch repair, New Lock Cylinder Installed

Problem 5: the previous homeowners drilled through the front face plate to put a doorknob in when the thumb latch broke. So I'm still on the hunt for a brass finial of sorts, to cover this part up. Big bummer, if you ask me...

 Just need a brass finial to cover the hole drilled

So how does it all look? It only took us 4.5 years to get the front door hardware working.

PS: Don't look to closely at the door itself, it needs a lot of work... More to come on this!